Setup
Eleven steps to a working starting line: a personal Google account, the gcloud CLI signed in, Git, claimed cloud credits, a project linked to billing, the right APIs enabled, the Cloud Build IAM grant pre-staged, Node 20, and Antigravity installed.
This is the one block where everyone needs to keep pace. Once your project is live and your tools are installed, you won't touch the cloud console again until step 6 (deploy).
1. Create a personal Google account (skip if you have one)
Everything in this workshop — Cloud, Antigravity, Stitch, Gemini — runs on a single Google account, and the TryGCP credits we'll use can only be redeemed on a personal Google account.
- Already have a personal Google account (any
@gmail.comor any other email you signed up with for personal use)? Use it — skip to step 2. - Don't have one? Create a free account with the steps below — it takes about a minute.
- School (
.edu) or company / Google Workspace account? Those cannot claim the credits, so the deploy step would cost you out of pocket. Create a personal account instead.
- Open accounts.google.com/signup.
- Choose For my personal use.
- Fill in name, date of birth, and gender.
- Pick a Gmail address — or click Use your existing email if you'd rather sign up with the email you already have. Both work for the workshop.
- Choose a strong password and verify your phone number.
- Accept the terms and finish the flow.
2. Install the Google Cloud CLI & sign in
The gcloud command-line tool is how you talk to Google Cloud from your terminal. You need it for setup, deploy, and almost everything else in this workshop.
First, check whether it's already installed:
gcloud versionIf you see version info, skip ahead to Sign in below. Otherwise, install it for your operating system:
First, find out which CPU your Mac has:
uname -mIt prints either arm64 (Apple Silicon, all Macs from late 2020 onward) or x86_64 (Intel). Pick the matching tab:
uname -m printed arm64:
curl -O https://dl.google.com/dl/cloudsdk/channels/rapid/downloads/google-cloud-cli-darwin-arm.tar.gztar -xf google-cloud-cli-darwin-arm.tar.gz./google-cloud-sdk/install.shuname -m printed x86_64:
curl -O https://dl.google.com/dl/cloudsdk/channels/rapid/downloads/google-cloud-cli-darwin-x86_64.tar.gztar -xf google-cloud-cli-darwin-x86_64.tar.gz./google-cloud-sdk/install.shThe installer asks two questions: say Y to "Add gcloud to your PATH" and Y to enable command completion. Then open a new terminal window so the PATH change takes effect.
When you install a new command-line tool, your existing terminal sessions don't know about it yet — they captured a snapshot of available commands when they opened. A fresh terminal window picks up the new gcloud automatically. Old windows still won't find it; you have to close and reopen them.
Open PowerShell (Start → type "PowerShell") and run:
(New-Object Net.WebClient).DownloadFile("https://dl.google.com/dl/cloudsdk/channels/rapid/GoogleCloudSDKInstaller.exe", "$env:Temp\GoogleCloudSDKInstaller.exe")

& $env:Temp\GoogleCloudSDKInstaller.exe
The installer GUI launches. Accept the defaults — including Run gcloud init after install. Once it finishes, close and reopen your terminal so the new gcloud on your PATH is picked up.
Prefer a regular installer? Download the .exe directly from dl.google.com and double-click it.
Debian / Ubuntu (recommended). Add Google's apt repository and install:
curl https://packages.cloud.google.com/apt/doc/apt-key.gpg | sudo gpg --dearmor -o /usr/share/keyrings/cloud.google.gpgecho "deb [signed-by=/usr/share/keyrings/cloud.google.gpg] https://packages.cloud.google.com/apt cloud-sdk main" | sudo tee -a /etc/apt/sources.list.d/google-cloud-sdk.listsudo apt-get update && sudo apt-get install google-cloud-cliSnap (Ubuntu). One-liner if you have snap:
sudo snap install google-cloud-cli --classicOther distros (Fedora, Arch, etc.). Download and run the generic Linux tarball:
curl -O https://dl.google.com/dl/cloudsdk/channels/rapid/downloads/google-cloud-cli-linux-x86_64.tar.gztar -xf google-cloud-cli-linux-x86_64.tar.gz./google-cloud-sdk/install.shOpen a new terminal after install so the PATH update takes effect.
Verify the install:
gcloud versionYou should see something like Google Cloud SDK 500.0.0 followed by component versions. If the command isn't found, your shell needs a fresh window to pick up the PATH update.
Troubleshooting — "gcloud: command not found"
Cause. gcloud isn't on your PATH, or the install never completed.
Fix. Reinstall the SDK and source the path file in your shell config.
curl https://sdk.cloud.google.com | bashexec -l $SHELLgcloud --versionSign in
Authenticate the CLI with your Google account. This opens a browser window — sign in with the same account you'll use for the workshop:
gcloud auth loginWhile you're at it, set up application default credentials. The post-workshop codelabs (Vertex AI, ADK) need these, and doing it now means you won't come back here later:
gcloud auth application-default login3. Install Git
You'll need git in step 5 — the agent initializes a repo and makes commits as part of scaffolding your project. You don't need a GitHub account — Cloud Run deploys directly from your local files in step 6, no Git remote required. This is just about having the CLI tool.
First, check whether it's already installed:
git --versionIf you see version info, you're done with this step. Otherwise, install it for your operating system:
The Xcode Command Line Tools include git. Install them with:
xcode-select --installA dialog pops up — click Install. The download is a few hundred MB; takes 2–5 minutes on a decent connection.
Open PowerShell and run:
winget install --id Git.Git -e --source wingetAccept the defaults at every prompt. Once it finishes, close and reopen your terminal so the new git on your PATH is picked up.
No winget on your system? Download the installer from git-scm.com/download/win and double-click it.
Debian / Ubuntu:
sudo apt-get update && sudo apt-get install gitFedora / RHEL:
sudo dnf install gitArch:
sudo pacman -S gitVerify the install:
git --versionYou should see something like git version 2.40.0. If the command isn't found, open a new terminal window so the PATH update takes effect.
4. Claim your cloud credits
- Sign in to only one Gmail in your browser. Multi-account sessions confuse the credit redemption flow.
- Use a Chrome Incognito window for the next ten minutes. Clean session, no extension surprises.
- Allow third-party cookies and disable ad-blockers for the redemption flow. It uses cross-domain redirects that some blockers break.
- Disconnect from corporate VPNs / strict proxies. They often block
trygcp.dev. Switch off for the next 15 minutes. - Have your laptop plugged in. Setup eats battery faster than you'd think.
The workshop uses TryGCP credits — a $5 trial billing account that's valid for 6 months and doesn't need a credit card. Plenty for everything in this workshop, with credits left over for the post-workshop codelabs.
Use the link below to claim your credits — it's the one for this workshop:
Direct URL (in case you need to copy-paste it into Incognito): trygcp.dev/claim/<event-id>
Then:
- Open the link in Incognito. Use a clean Chrome Incognito window.
- Sign in with Gmail. Use the same personal Google account you'll use for the rest of the workshop.
- Click "access credits." The page prompts you with a single button.
- Verify your name and accept the T&Cs. Click "Accept and Continue."
That creates a "Google Cloud Platform Trial Billing Account" attached to your Gmail. The credits live there — not on a project yet. The next steps create a project and link the credits to it.
Visual walkthrough — what each claim step looks like
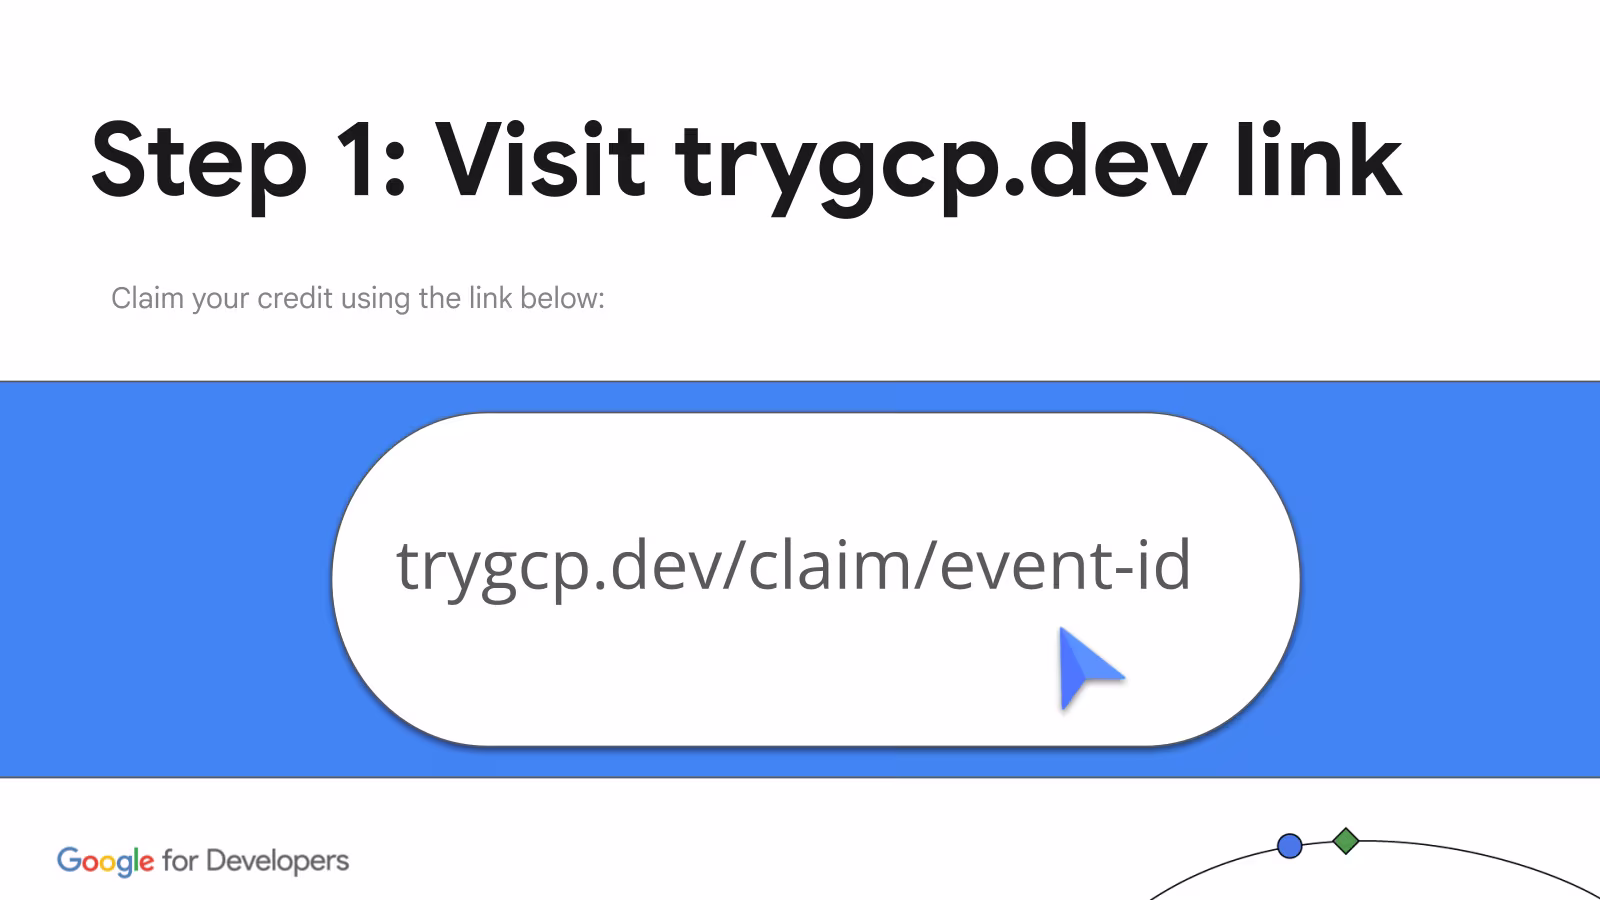
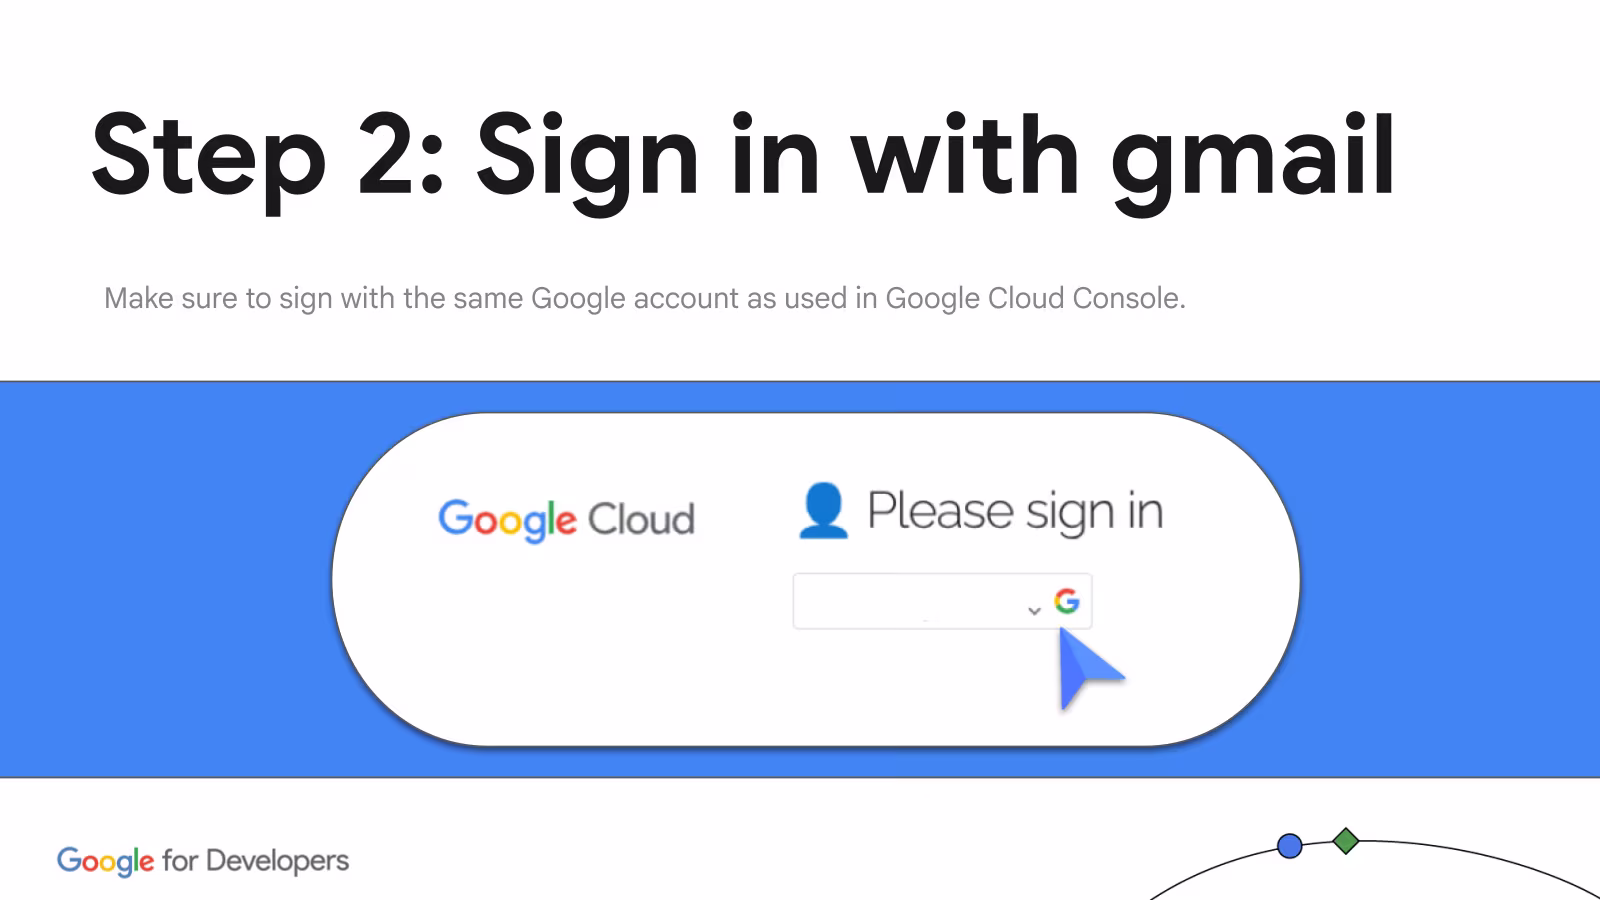
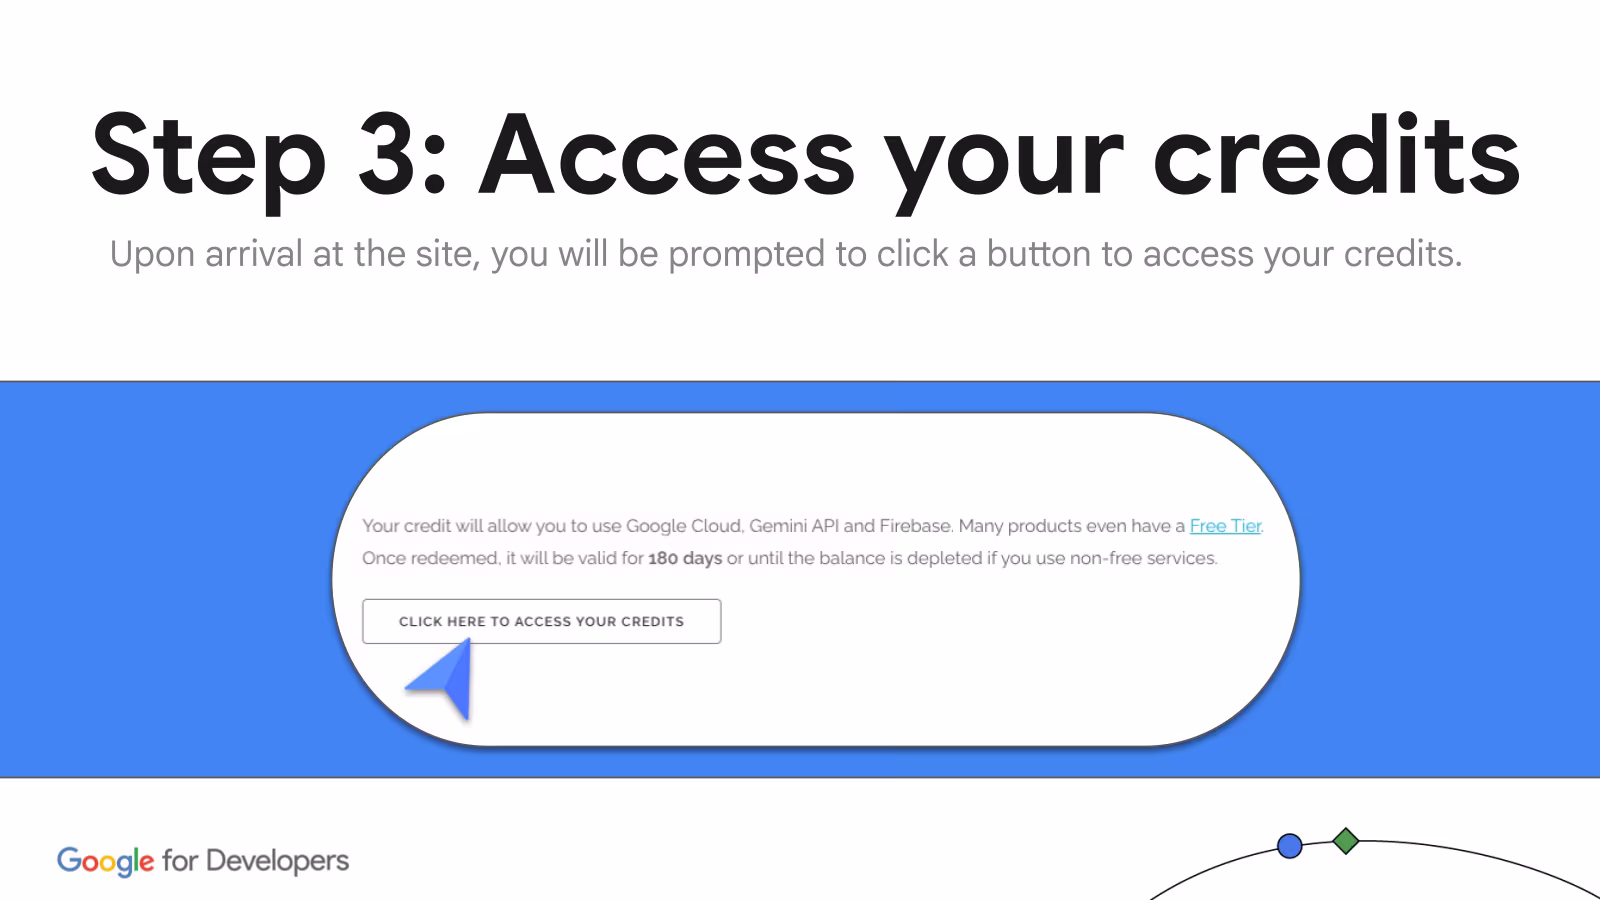
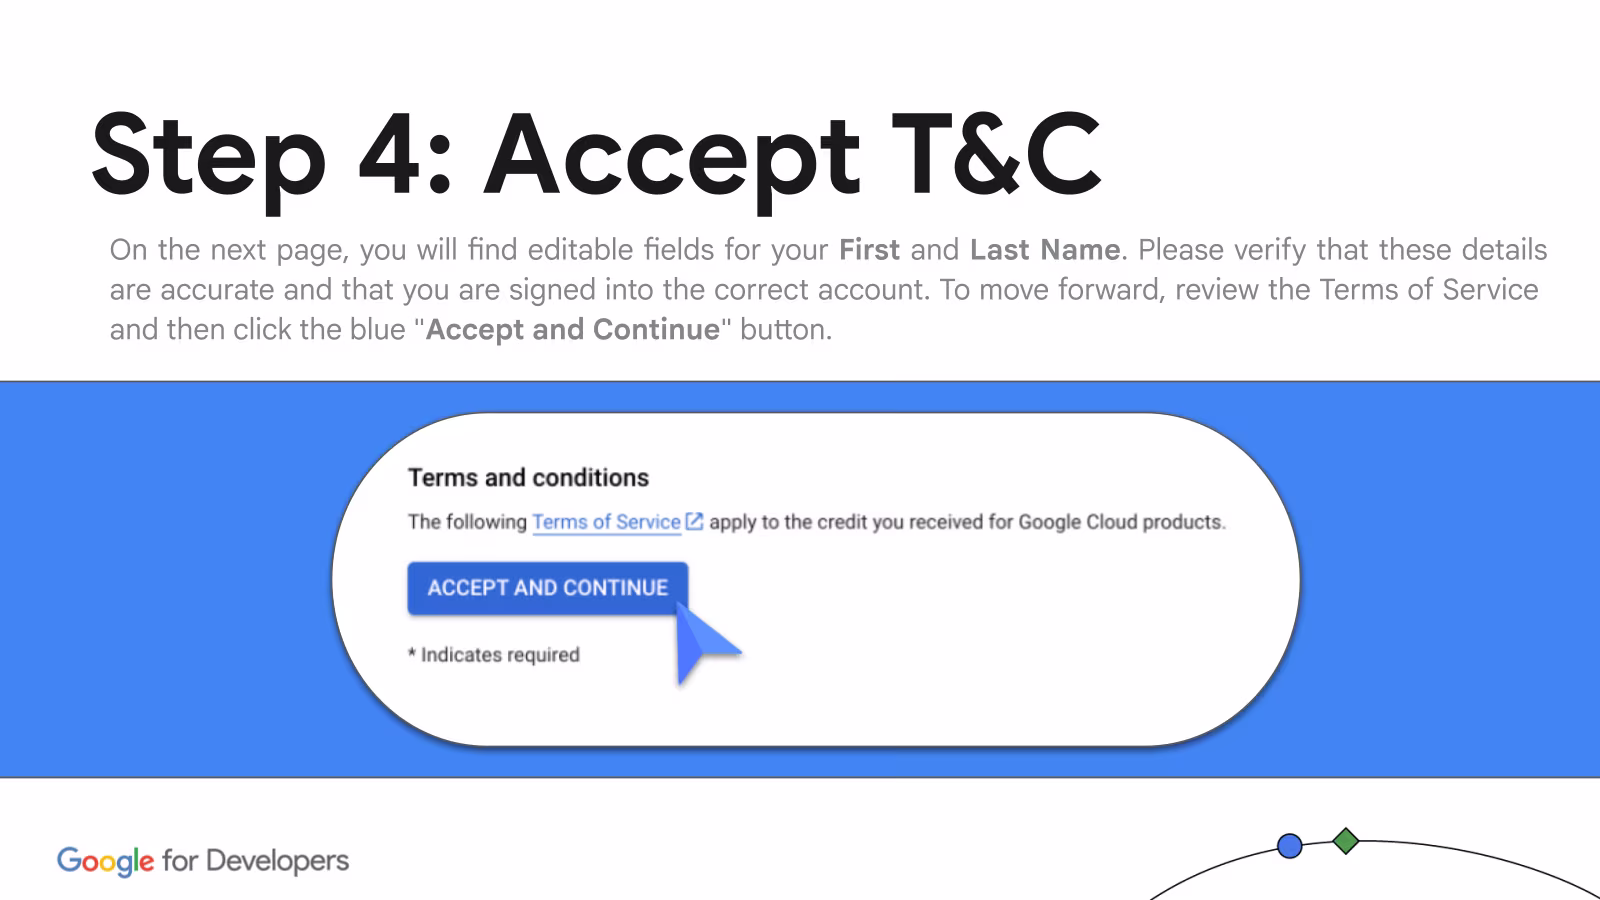
Screenshots: Google Cloud & AI Train-the-Trainer materials.
Troubleshooting — Where are my credits?
Symptom. You claimed credits but can't see them anywhere on the project.
Why. Credits live on the billing account, not the project. The project dashboard doesn't show them.
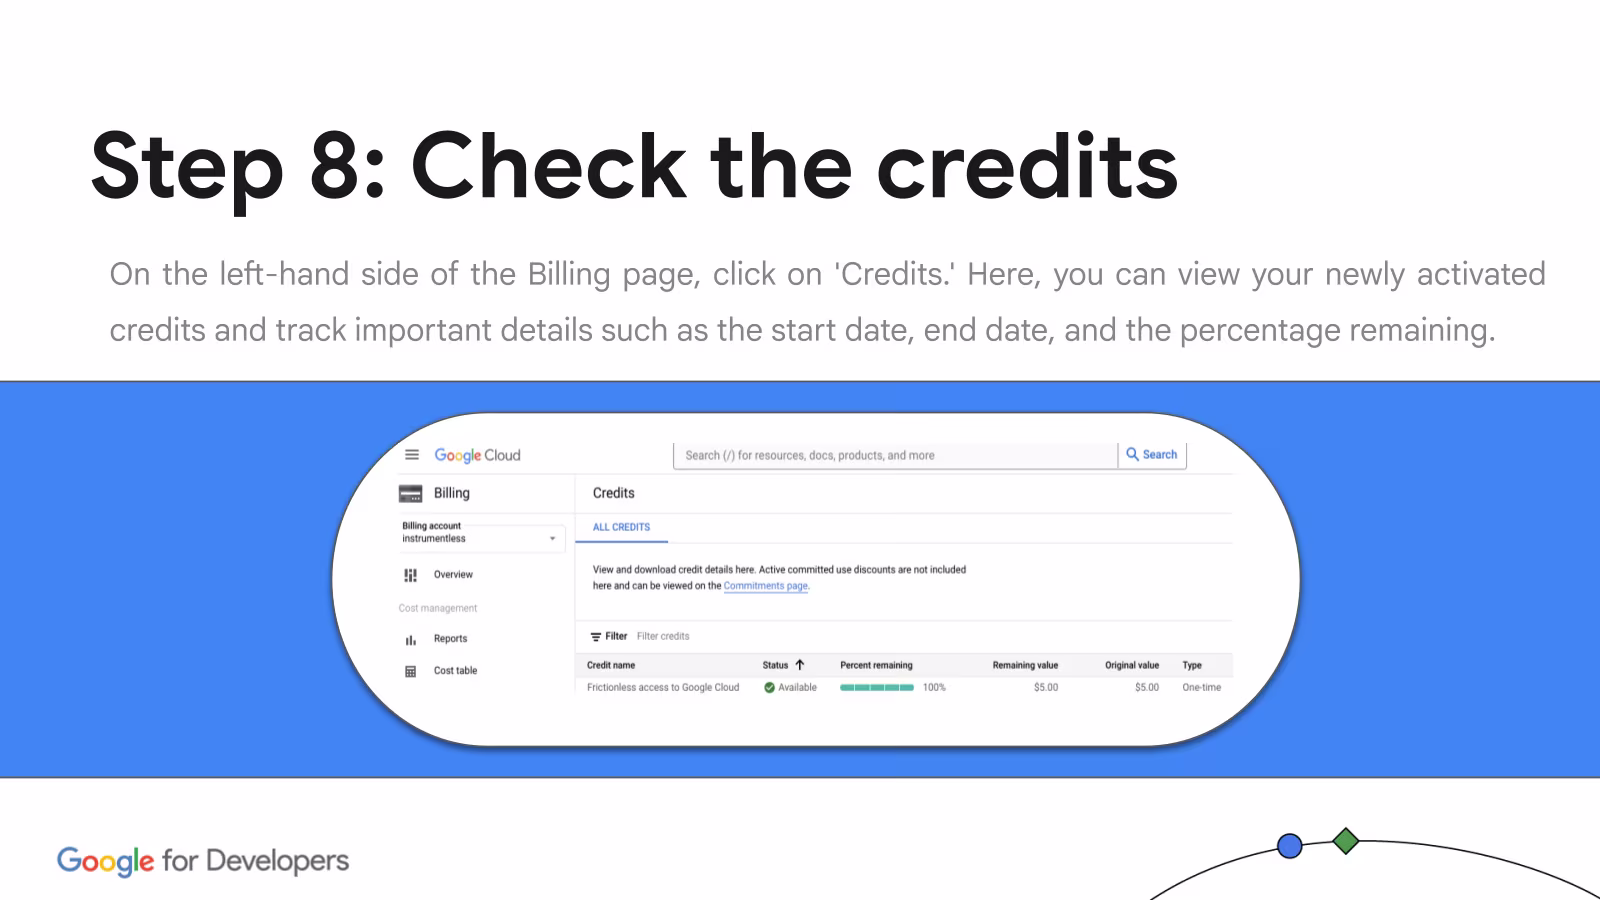
Fix. Navigation menu → Billing → Credits tab. You'll see start date, end date, and percentage remaining.
Troubleshooting — trygcp.dev won't load
Symptom. The trygcp.dev claim URL won't load, redirects fail, or hangs at "signing in."
Why. Three usual causes: corporate VPN / proxy blocking the domain, ad-blocker eating the redirect cookies, or multiple Google accounts confusing the sign-in.
Fix. Open Chrome Incognito. Disconnect VPN. Allow third-party cookies for google.com and trygcp.dev. Sign in with one Gmail only.
5. Create a Google Cloud project
- Open the Google Cloud Console in the same Incognito window.
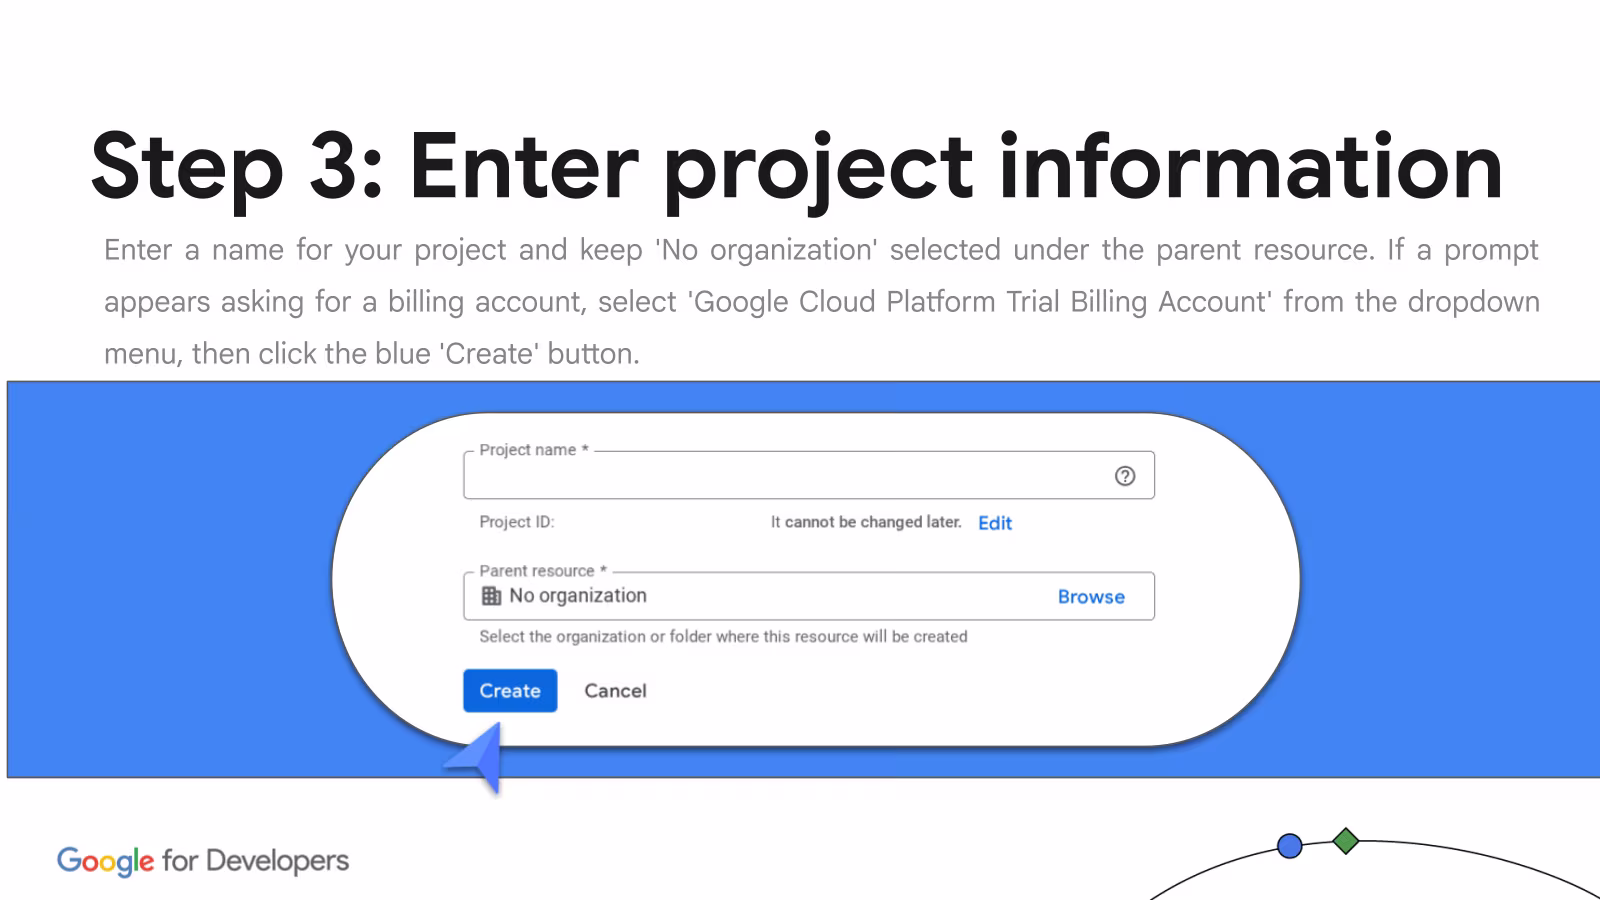
- Click the project picker in the top bar (next to the Google Cloud logo) and choose New project.
- Enter a name like
gde-workshop-2026. Leave No organization selected as parent. - If a billing-account dropdown appears, pick Google Cloud Platform Trial Billing Account. Click Create.
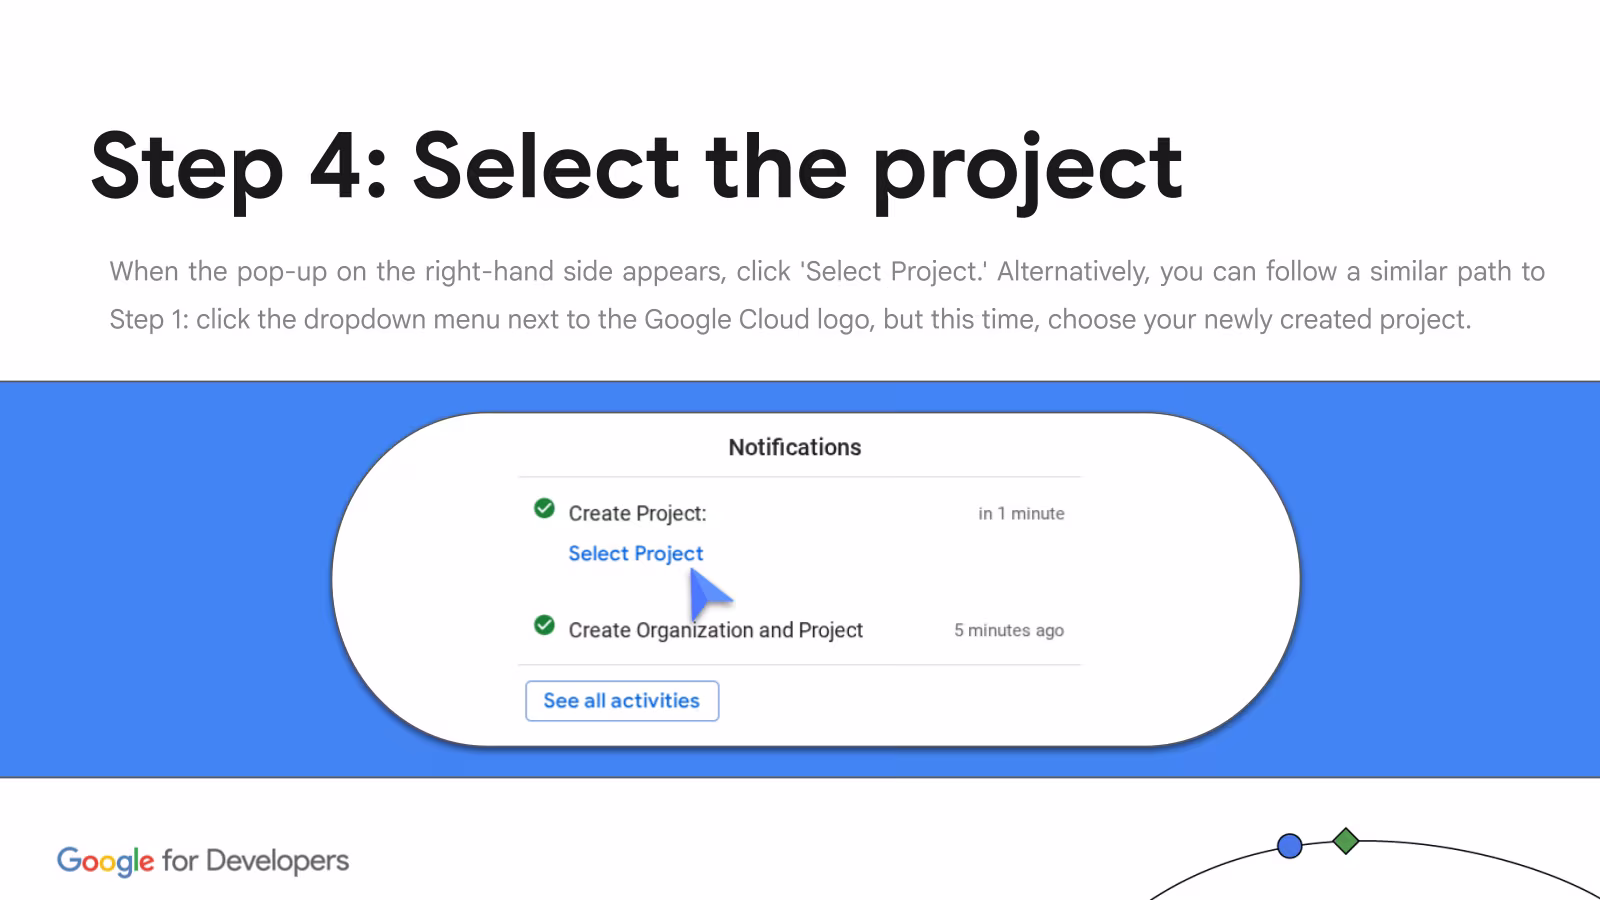
- Note the auto-generated project ID — it may differ from the name. You'll need it shortly.
Visual walkthrough — creating the project


Screenshots: Google Cloud & AI Train-the-Trainer materials.
Troubleshooting — "Project ID already taken"
Symptom. The console rejects "Create" with a vague error about the project ID.
Why. Project IDs are globally unique across all of Google Cloud, not just your account. Common names like gde-workshop-2026 are likely already reserved.
Fix. Append a unique suffix to the ID: random hex (-7f3a), your initials, today's date. The display name can stay readable; only the ID needs to be unique.
6. Link the trial billing to your project
If the dropdown in step 5 let you set billing during project creation, you can skip this step. Otherwise:
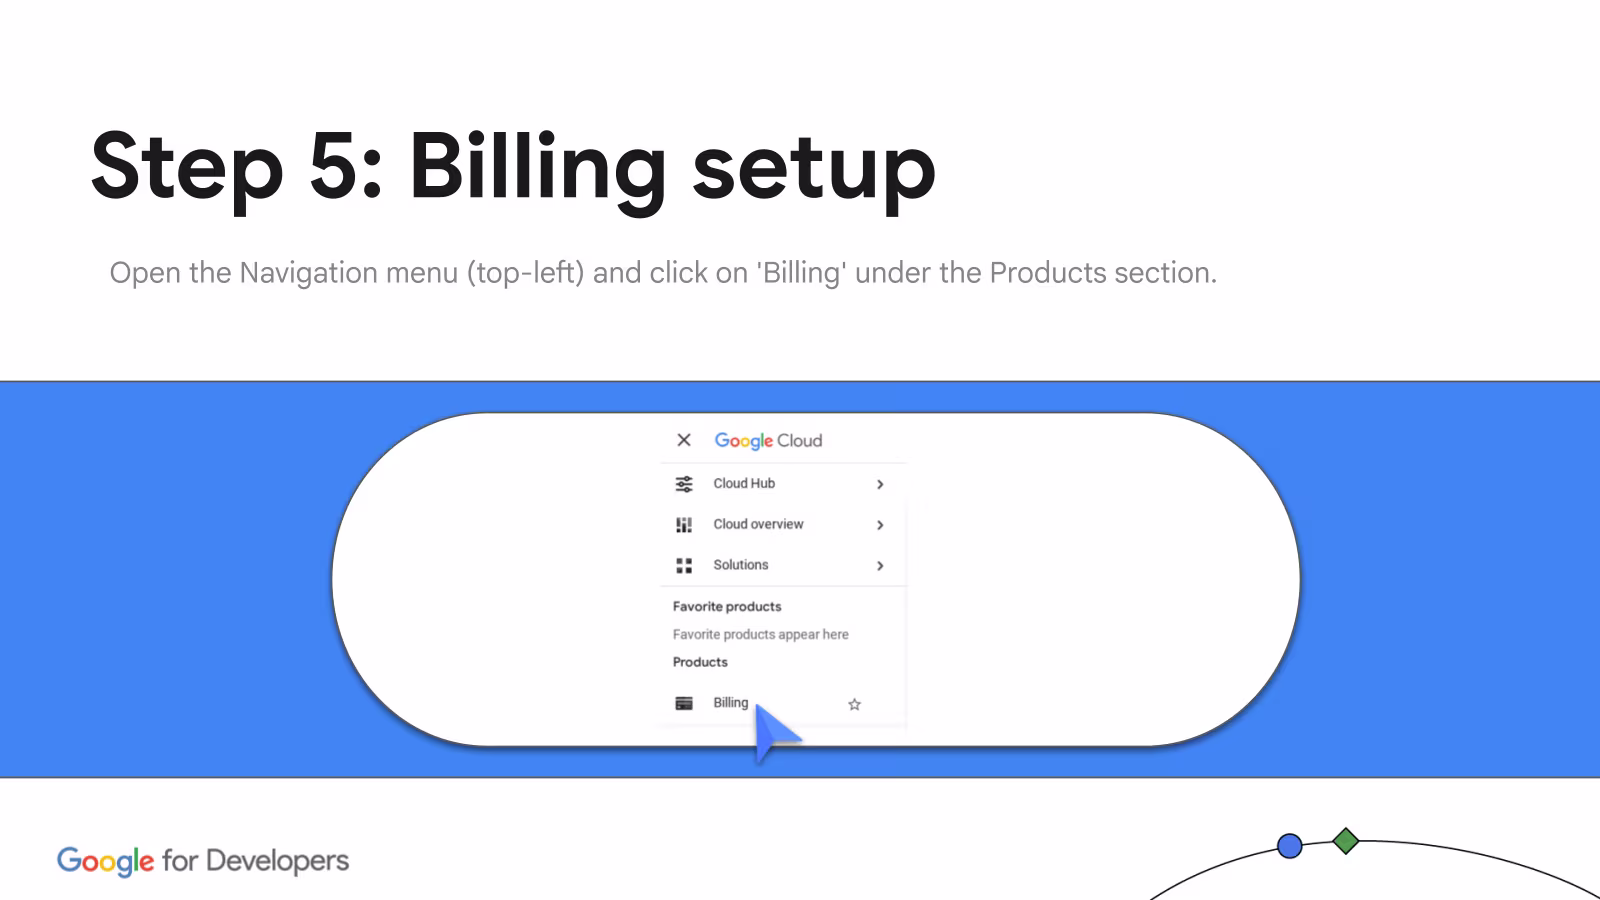
- Open the navigation menu (top-left) → Billing.
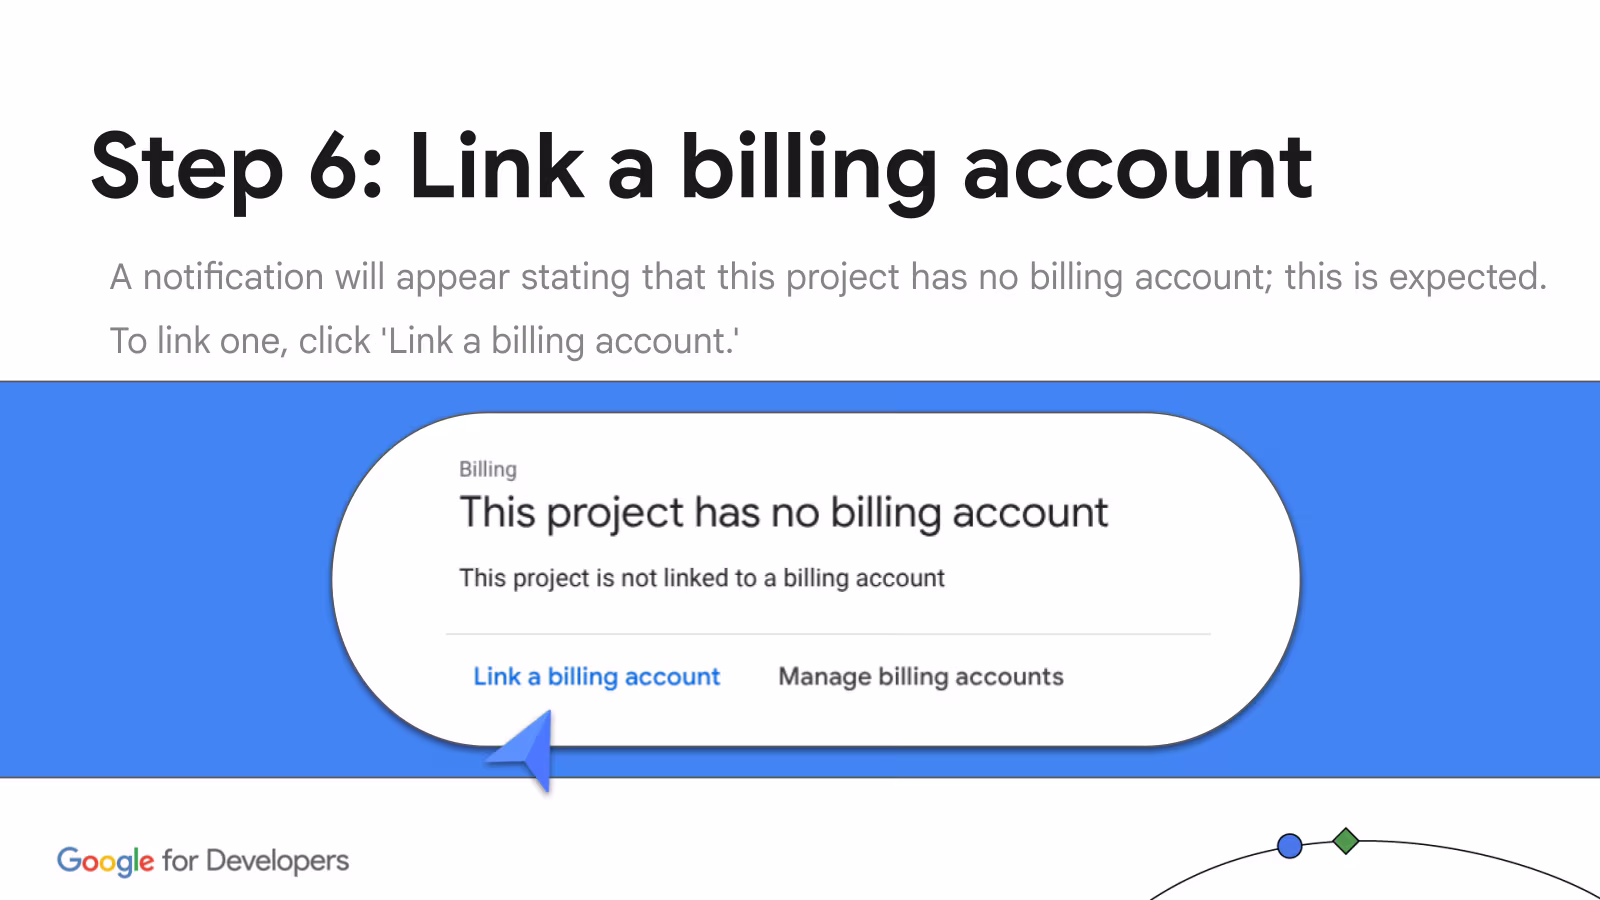
- You'll see a notice that the project has no billing account. Click Link a billing account.
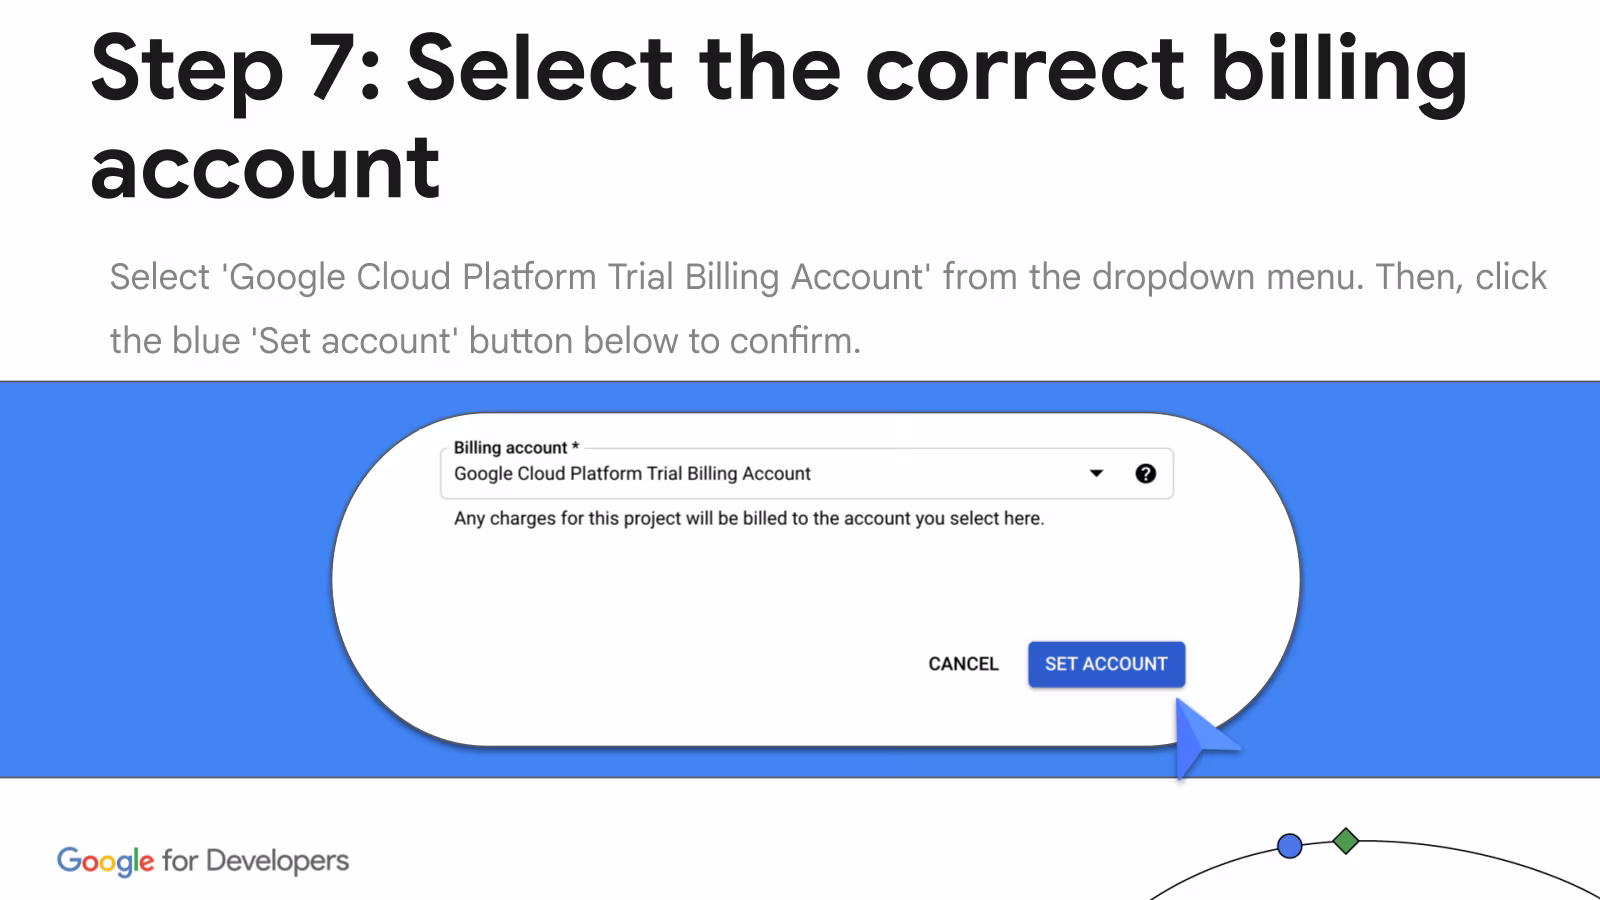
- Pick Google Cloud Platform Trial Billing Account — exactly that one, not any other personal billing account you might have. Click Set account.
If you've used Google Cloud before, you probably have a personal billing account already. The dropdown will show both. Pick the trial — picking your own billing means you pay out of pocket while the $5 credit sits unused. The trial is the one with "Trial Billing" in the name.
Already linked the wrong one? Project picker → 3-dot menu next to your project → Change Billing → pick the trial.
Visual walkthrough — linking the trial billing
Screenshots: Google Cloud & AI Train-the-Trainer materials.
Optional — rename the billing account if you have several
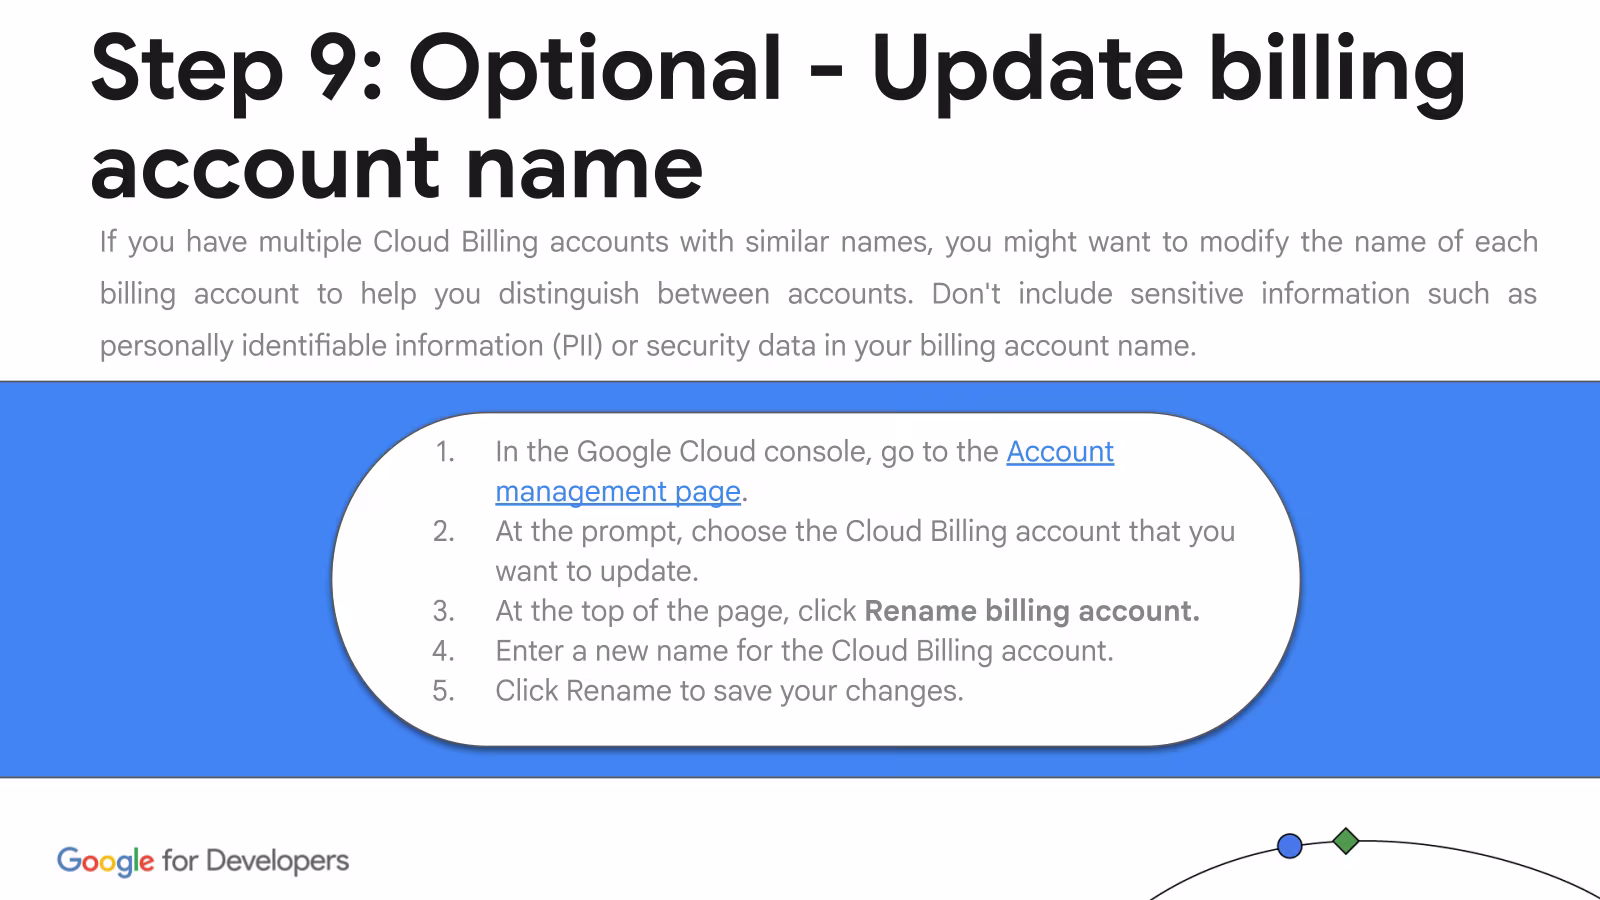
Screenshot: Google Cloud & AI Train-the-Trainer materials.
Troubleshooting — Wrong billing account linked
Symptom. You linked billing but it's the wrong account — your existing personal billing, not the trial. Charges go to your card.
Why. If you've used Google Cloud before, the dropdown shows multiple billing accounts. The trial is a separate, new one.
Fix. Project picker (top bar) → 3-dot menu next to your project → Change Billing → pick Google Cloud Platform Trial Billing Account.
7. Point gcloud at the project
Tell the CLI which project to talk to. Use the project ID from step 5 (not the display name):
gcloud config set project YOUR_PROJECT_IDVerify:
gcloud config get-value projectTroubleshooting — Wrong project active
Cause. gcloud's active project is set to something old (a personal sandbox, last week's workshop, etc.).
Fix.
gcloud config set project YOUR_PROJECT_ID8. Enable the required APIs
Four APIs cover everything in the workshop, plus Vertex AI for the post-workshop codelabs. Enabling them all now means you won't have to come back here later.
gcloud services enable run.googleapis.com artifactregistry.googleapis.com cloudbuild.googleapis.com aiplatform.googleapis.comrun.googleapis.com— Cloud Run, where your site will live.artifactregistry.googleapis.com— stores the container image for your site.cloudbuild.googleapis.com— builds that image from your source.aiplatform.googleapis.com— Vertex AI. Not needed for the core build, but the post-workshop codelabs (MCP, ADK) use it. Enable now to avoid coming back.
Troubleshooting — "Cannot enable services" / billing not linked
Symptom. gcloud services enable errors out with a permission, quota, or billing message.
Why. No billing account is linked to the project yet — even though credits are in your trial billing account, they aren't reachable from the project until you link it.
Fix. Go back to step 6 and confirm the trial billing is linked. Then re-run the enable command.
Troubleshooting — "API [foo.googleapis.com] not enabled" later
Cause. A required API is off, or the enable just propagated and your CLI cached the old state.
Fix. Re-run the enable above. If a specific API is missing, run it on its own:
gcloud services enable run.googleapis.comTroubleshooting — "PERMISSION_DENIED" or "quota exceeded"
Cause. You're authenticated to a project that doesn't have billing enabled, or your account lacks IAM roles.
Fix. Confirm the active project, billing, and your role:
gcloud config get-value projectgcloud projects describe $(gcloud config get-value project)gcloud auth listIn the Cloud Console, open Billing and confirm the project is linked. In IAM & Admin, check you have at least roles/editor for the workshop work.
9. Pre-grant Cloud Build the right to deploy
The first time you deploy from source on a fresh project, Google's Cloud Build service account needs permission to create a Cloud Run service on your behalf. This is the single most common first-deploy gotcha — so do it now, while you're still in setup mode, instead of debugging it 90 minutes from now under time pressure:
PROJECT_ID=$(gcloud config get-value project)
PROJECT_NUMBER=$(gcloud projects describe $PROJECT_ID --format='value(projectNumber)')

gcloud projects add-iam-policy-binding $PROJECT_ID \
  --member="serviceAccount:${PROJECT_NUMBER}-compute@developer.gserviceaccount.com" \
  --role="roles/run.builder"
Run these three commands in order. Replace YOUR_PROJECT_ID and YOUR_PROJECT_NUMBER with the values printed by the first two commands.
1. Get your project ID:
gcloud config get-value project2. Get the project number (paste your project ID where shown):
gcloud projects describe YOUR_PROJECT_ID --format="value(projectNumber)"3. Grant the role (paste both values where shown):
gcloud projects add-iam-policy-binding YOUR_PROJECT_ID --member="serviceAccount:YOUR_PROJECT_NUMBER-compute@developer.gserviceaccount.com" --role="roles/run.builder"One-time per project. The deploy step (step 6) will reference this and skip it if it's already done.
10. Install Node.js 20+
The agent will scaffold a Node 20 project for you in step 5, and the Gemini CLI fallback below also runs on Node 20. First, check whether it's already installed:
node --versionIf you see v20.x.x or higher, skip the install steps below and go straight to step 11. Otherwise, install Node 20+ for your operating system:
Recommended — Homebrew. If you don't have Homebrew, install it first from brew.sh. Then:
brew install node@20brew link --overwrite node@20Open a new terminal window so the new node on your PATH is picked up.
Alternative — nvm (if you want to switch Node versions for different projects):
curl -o- https://raw.githubusercontent.com/nvm-sh/nvm/v0.40.1/install.sh | bashOpen a new terminal, then:
nvm install 20 && nvm use 20Alternative — official installer. Download the macOS .pkg from nodejs.org (pick the LTS, currently 20.x) and double-click it.
Recommended — winget. Open PowerShell and run:
winget install OpenJS.NodeJS.LTSAccept the defaults at every prompt. Once it finishes, close and reopen your terminal so the new node on your PATH is picked up.
Alternative — official installer. No winget? Download the Windows .msi from nodejs.org (pick the LTS, currently 20.x) and double-click it. The installer adds Node and npm to your PATH automatically — close and reopen your terminal afterwards.
Alternative — fnm (lets you switch Node versions):
winget install Schniz.fnmThen in a new terminal:
fnm install 20fnm use 20Recommended — NodeSource apt repository (Debian / Ubuntu). The distro repos are often too old; this gets you a real Node 20:
curl -fsSL https://deb.nodesource.com/setup_20.x | sudo -E bash -sudo apt-get install -y nodejsFedora / RHEL:
curl -fsSL https://rpm.nodesource.com/setup_20.x | sudo bash -sudo dnf install -y nodejsAlternative — nvm (no sudo required, lets you switch versions):
curl -o- https://raw.githubusercontent.com/nvm-sh/nvm/v0.40.1/install.sh | bashOpen a new terminal, then:
nvm install 20 && nvm use 20Arch:
sudo pacman -S nodejs npmVerify the install:
node --versionnpm --versionYou should see v20.x.x (or higher) for Node and a version like 10.x.x for npm. If the command isn't found, open a new terminal window so the PATH update takes effect.
The site you'll deploy in step 6 pins Node 20 in its Dockerfile, so matching it locally avoids "works on my machine" surprises. Node 22 will work for local dev but Cloud Run will run your container on Node 20 either way — better to test locally on the same version.
11. Install Antigravity (your agentic editor)
Antigravity is Google's agentic IDE — it's the default for this workshop and what most slides reference. Gemini CLI is a terminal-based fallback that drives the same Gemini agent infrastructure; the only difference is the UI. Install both if you can: if Antigravity has a bad day during the workshop (auth errors, agent loops, slow responses), you can switch to the CLI without losing progress.
- Go to antigravity.google and download the build for your operating system.
- Install and launch it.
- Sign in with the same Google account you used for Cloud.
Already have Antigravity installed? You're done with this step.
Gemini CLI installs as a global npm package. Node 20 (step 10) is a prerequisite — confirm node --version first.
npm install -g @google/gemini-cli- If
npm install -gfails with "EACCES" / "EPERM": Node is installed inC:\Program Files\and the global npm prefix needs admin rights. Either run PowerShell as Administrator for this one command, or set a user-writable npm prefix once:npm config set prefix "$env:USERPROFILE\npm"and add%USERPROFILE%\npmto your PATH. - If
gemini --versionsays "command not found": open a fresh terminal so PATH picks up the new shim. Same gotcha as gcloud and Git earlier.
Verify the install:
gemini --versionThe first time you run gemini it will open a browser window to sign in — use the same Google account you used for Cloud and Antigravity.
Why install both? Both Antigravity and Gemini CLI talk to the same Gemini agent infrastructure. Only the surface differs (IDE panel vs. terminal prompt). If Antigravity stalls during the workshop, the CLI is a one-command escape hatch that picks up the same workflow.